AuctionGate | Logistic CRM system - How to create a bill?
To create a bill, click on the "Add bill" button (Figure 1, Pointer 1).
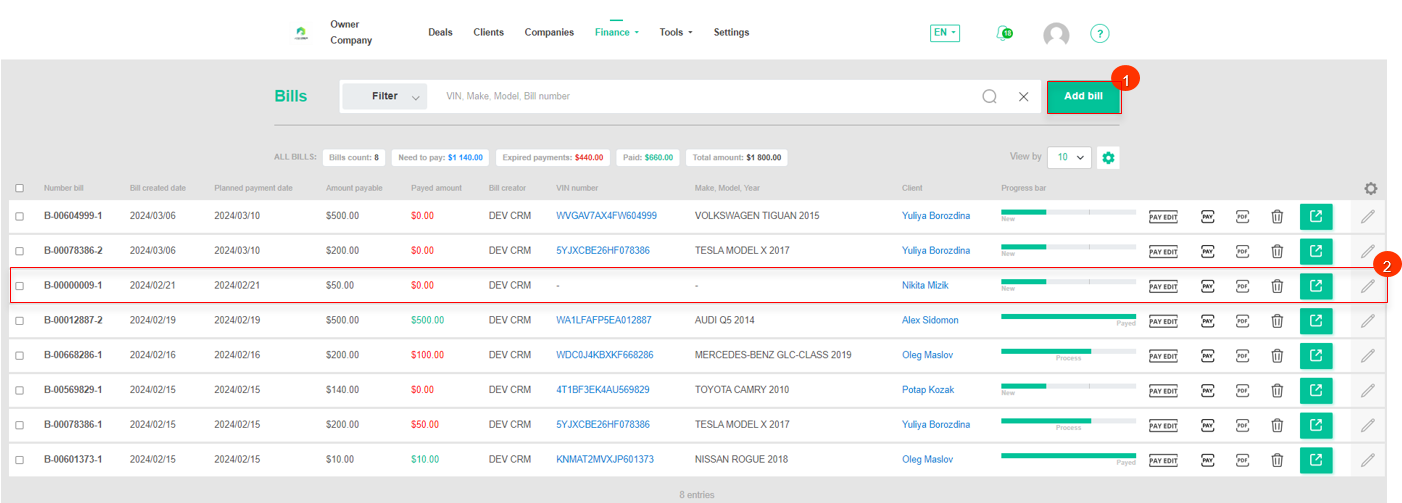
Figure 1 - " Bills" page
This will open the "Bills" window (Figure 2), which presents 3 blocks of information:
- Block "Add bill". This box displays general account information (Figure 2, Pointer 1):
-
“Amount” - bill amount;
-
“Payed amount” - bill amount paid.
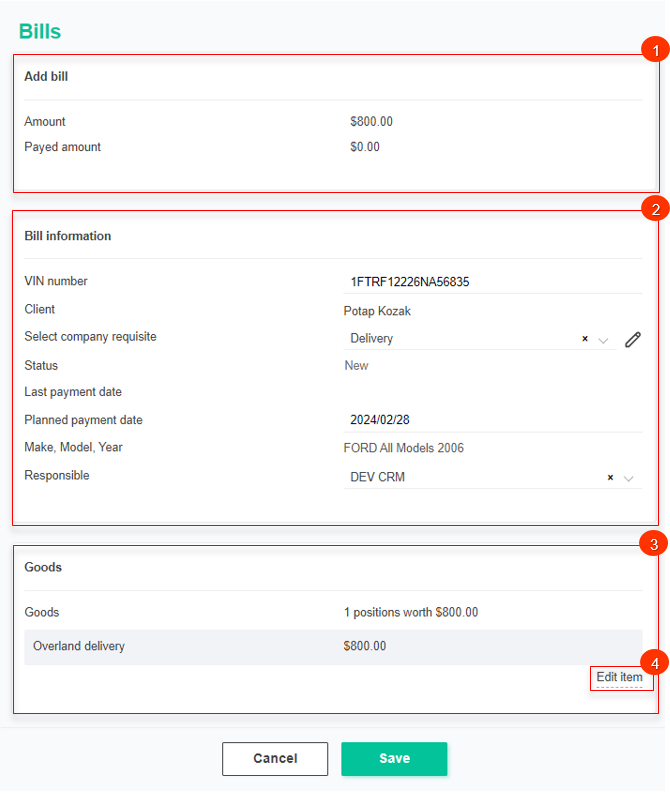 Figure 2 - "Accounts" window
-Block “Bill information”. This block contains basic information about the bill (Figure 2, Pointer 2).
-
“VIN number” - enter the VIN number of the vehicle;
-
“Client” - select a client from the drop-down list that opens when you click on the
 button;
Note: You can bill a customer even if the customer does not have a VIN number assigned to it. However, you cannot create an invoice that is linked only to a VIN number without a linked customer.
-
“Select company requisite” - from the drop-down list that opens when you press the
 button , select the company details template;
Note: Details are created on the "Finance Settings" page in the "Company and Requisite" section. You can also edit or delete existing details there.
-
“Status” -financial status of the account, can have the following values: "New", "Partially paid", "Paid". This status is assigned by the system automatically and indicates the current financial status of the invoice and its payment;
-
“Last payment date” -enter the date on which the last payment was made on this account;
-
“Planned payment date” - deadline for invoice payment, which is set automatically based on the financial settings;
-
“Responsible” - from the drop-down list that opens when you click on the
 button, select the employee who will be in charge of its current maintenance.
- Block “Goods”. This block is for adding products or services related to this account (Figure 2, Pointer 3). To add a product, click on "Edit Item" (Figure 2, Pointer 4), which will open the "Products" window where you fill in the fields:
-
“Goods” - from the drop-down list that opens when you click on the
 button, select the desired product or service;
 -
“Price” - using keyboard input or by pressing the
 buttons, enter the cost of the service.
To create multiple items, add the required number of rows by clicking on the "Add item" button (Figure 3, Pointer 1) and repeat the process of filling in the fields. If you need to delete a row, click on the ![]() button.
button.
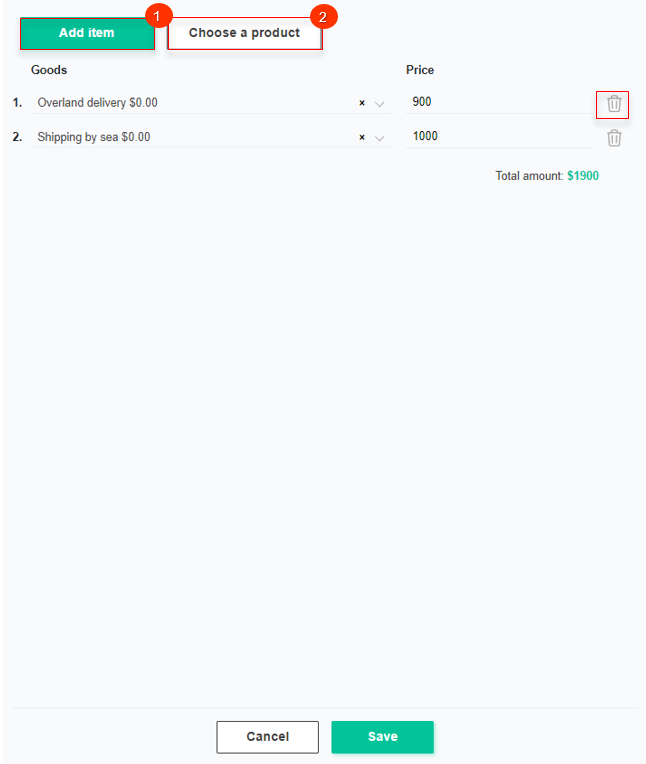 Figure 3 - "Add Product" window
If you want to create a new product, click on the "Choose a product" button (Figure 3, Pointer 2) and the "Edit item" window will open, which is used to create, edit and delete a product and its category.
To create a product category in which to place the product, click on the "Create category" button (Figure 4, Pointer 1), which will open the "Create category" window where you enter a name and check the "Active" box (Figure 5, Pointer 1).
Note: If unchecked, this category will not appear in the list of available categories when adding a new product.
To save the data click on the "Save" button, in case of canceling click on the "Cancel" button. As a result of the actions performed, a category will be created, which will be displayed in the "Sections" list.
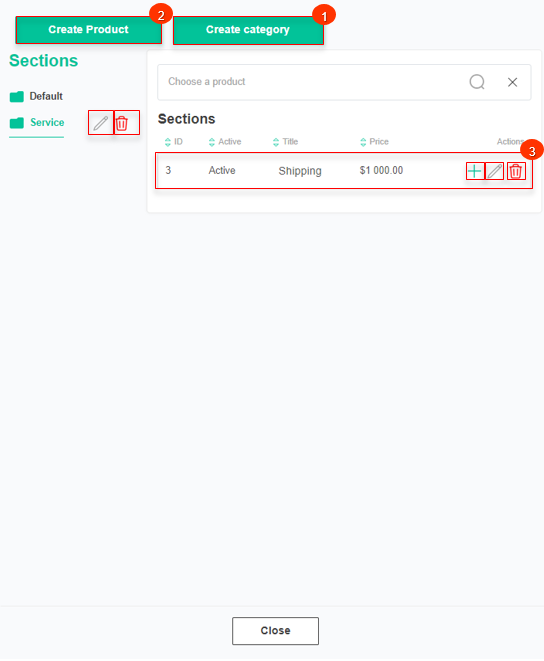 Figure 4 - "Edit item" window
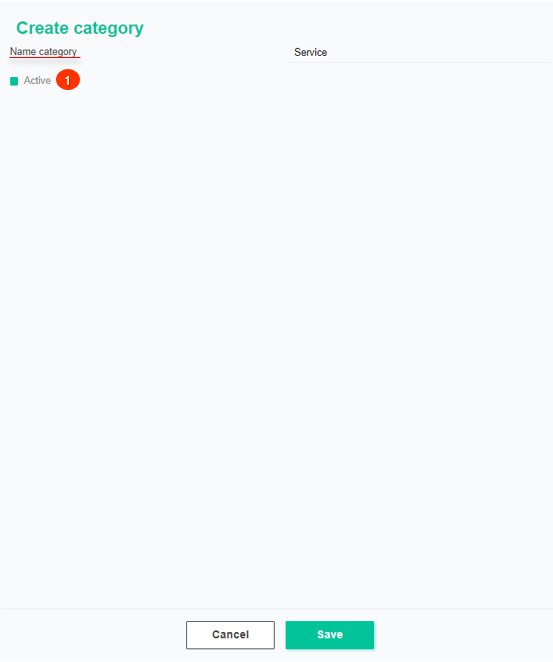 Figure 5 - "Create category" window
To edit a category, click on the ![]() button on the right side of the entry. After that, the "Create category" window opens (Figure 5), where data changes are performed in the same way as when creating a category (see above).
button on the right side of the entry. After that, the "Create category" window opens (Figure 5), where data changes are performed in the same way as when creating a category (see above).
To delete a category, click on the ![]() button on the right side of the entry. As a result, the category will be absent from the list.
button on the right side of the entry. As a result, the category will be absent from the list.
Note: The "Default" category cannot be edited or deleted.
To create a product, click on the "Create Product" button (Figure 4, Pointer 2) and fill in the fields in the "Create Product" window that opens:
-
“Name product” - enter the product name;
-
“Select category” - select a category from the drop-down list that opens when you click on the
 button;
 -
“Price” - using the keypad input or by pressing the
 buttons to enter the cost;
Check the ![]() box next to Active (Figure 6, Pointer 1).
box next to Active (Figure 6, Pointer 1).
Note: If not checked "Active," this product will not be available to be added to the account.
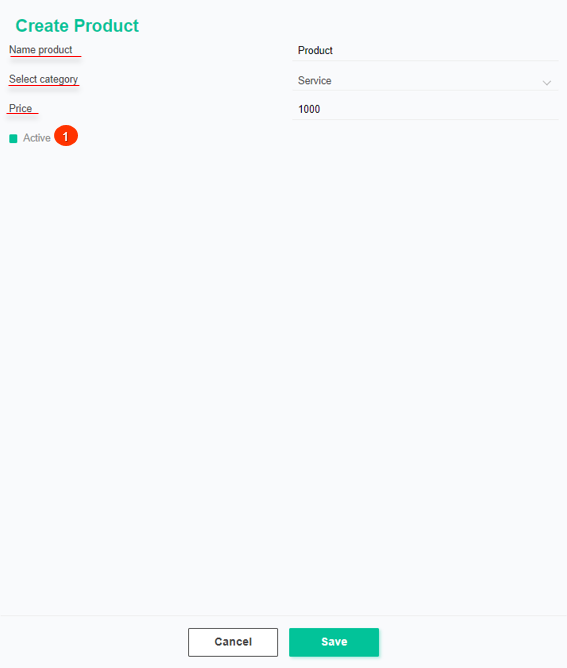 Figure 6 - "Create Product" window
To save the data click on the "Save" button, in case of canceling click on the "Cancel" button . As a result of the actions performed, the product will be created and displayed in the table (Figure 4, Pointer 3).
To edit a product, click on the ![]() button, which is located on the right side of the entry in the table (Figure 4, Pointer 3). After that the "Create Product" window opens (Figure 6), where data changes are performed in the same way as when creating a category (see above).
button, which is located on the right side of the entry in the table (Figure 4, Pointer 3). After that the "Create Product" window opens (Figure 6), where data changes are performed in the same way as when creating a category (see above).
Note: The "Default" product cannot be edited except for the amount.
To delete a product, click on the ![]() button (Figure 4, Pointer 3), which is located on the right side of the entry in the table. As a result, the product will be absent from the table.
button (Figure 4, Pointer 3), which is located on the right side of the entry in the table. As a result, the product will be absent from the table.
To add a product to an invoice, click on the ![]() button (Figure 4, Pointer 3), which will add the product to the invoice without the need for additional steps.
button (Figure 4, Pointer 3), which will add the product to the invoice without the need for additional steps.
To save the invoice click on the "Save" button, in case of cancelation click on the "Cancel" button . As a result of the actions performed, an invoice will be created and displayed in the table (Figure 1, Pointer 2).


