AuctionGate | Account management - How to create an employee?
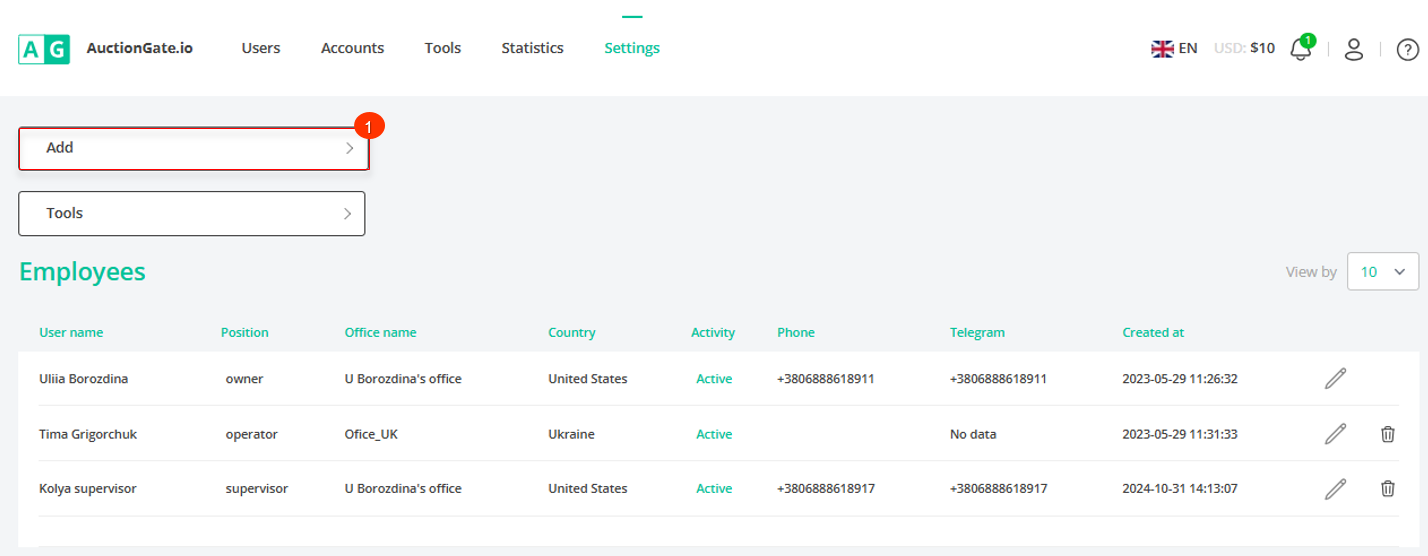
To create an employee account, click the "Add" button (Figure 1, Pointer 1).

Figure 1 - The Employees page of the website
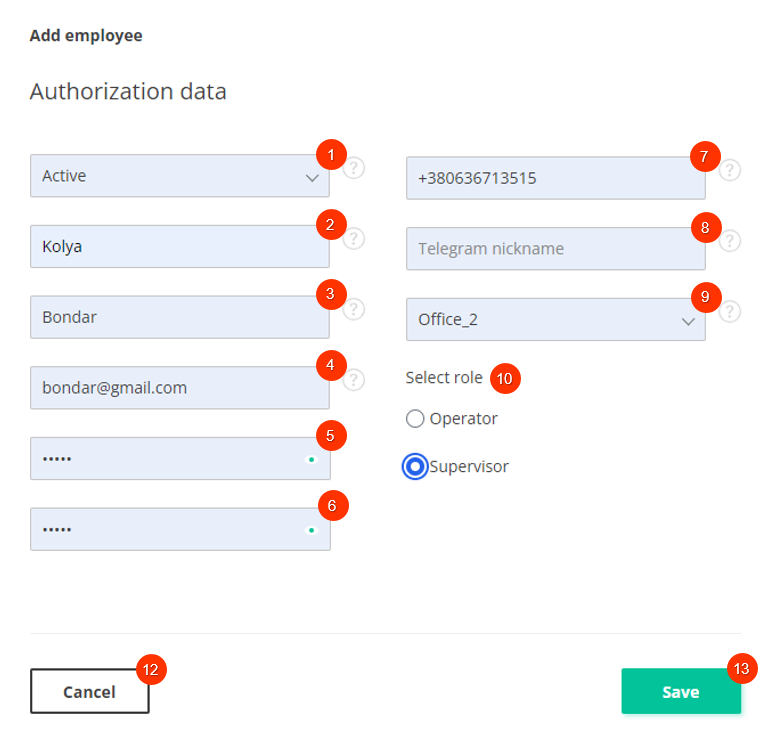
Then in the opened "Add Employee" window (Figure 2), fill in the fields:
Authorization data
-
"Select status" - from the drop-down list that opens when you click on the button
, select the employee status (Pointer 1);
Note: if "Inactive" is selected:
-
The employee will not have the ability to authorize on the site;
-
This employee cannot be assigned to a user.
-
"First Name" - enter the employee's name (Pointer 2);
-
"Last Name" - enter the last name of the employee (Pointer 3);
-
"Email" - enter the employee's e-mail address, which will be used by the employee in the future for authorization on the site (Pointer 4);
-
"Password" - enter the password that will be used by the employee in the future for authorization on the site (Pointer 5);
-
"Confirm Password" - re-enter the password that was entered in the field above (Pointer 6);
-
"Phone" - enter the employee's phone number in the format +380*********, which is used by WhatsApp messenger to display the contact in the "Documents" block of the AuctionGate extension (Pointer 7);
-
"Telegram nickname" - Enter the nickname that is used in Telegram to display the contact in the "Documents" block of the AuctionGate extension (Pointer 8);
-
"Select office" - select the office where the employee works (Pointer 9) from the drop-down list that opens when you press the button
;
-
"Select a role" - check the box
in the field opposite the desired value (Pointer 10). When selected, the value:
-
"Operator" - an employee sees only the accounts he is assigned to as an employee and the accounts of users who are assigned to him;
-
"Supervisor" - the employee sees all users and operators assigned to the office.
To save the data click on the "Save" button (Pointer 11), in case of canceling click on the "Cancel" button (Pointer 12). As a result of the performed actions there will be created account to the employee, which will be displayed in the tabular area (Figure 4, Pointer 1).

Figure 2 - Add Employee window


