AuctionGate | Account management - Site page "Invoices"
The "Invoices" page of the website is intended for creating invoices for payment of lots.
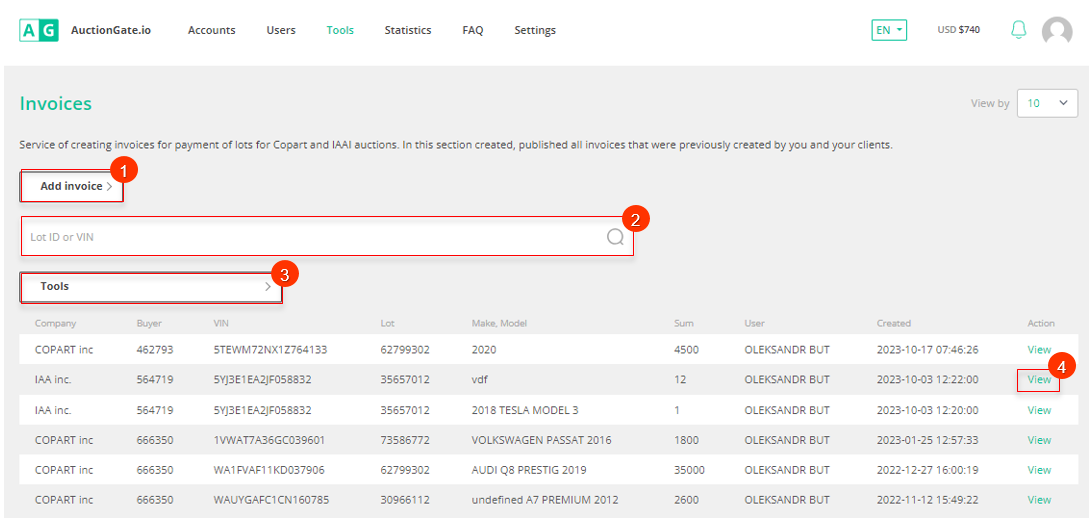
The site's Invoice Generator page includes a search bar, a filter area, and a table area that displays all the invoices that have been previously created on the site (Figure 1).
In the search bar, the desired invoice is searched by lot number or VIN number (Pointer 2). After entering the number, press the button located in the search line or press the "Enter" button located on the keyboard. As a result, the searched invoice will be displayed in the table area.
Clicking on the "Tools" button (Pointer 3) opens the filter area, which is used to set the parameter (Figure 2):
-
"Auction" - select an auction from the drop-down list that opens when you click on the button
.
After entering the parameter, click on the "Apply" button to generate the list of invoices, in case of canceling - click on the "Clear" button. As a result, the tabular area will display data according to the set filter parameter.

Figure 1 - Site page "Invoices"

Figure 2 - Filter area
Invoice creation
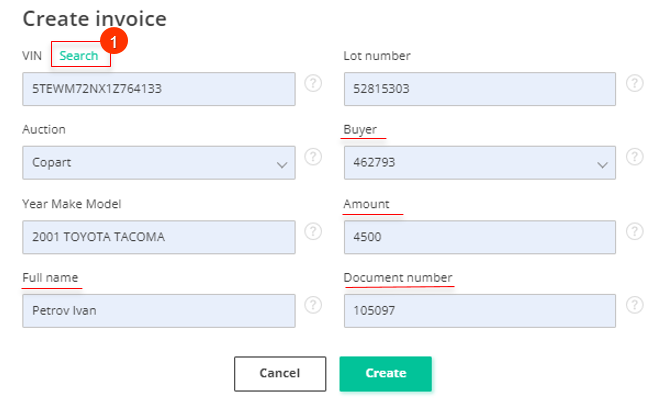
To create an invoice, click on the "Add Invoice" button (Figure 1, Pointer 1). After that the "Create Invoice" window will open, in which fill in the fields (Figure 3):
-
"VIN" - enter the VIN number of the lot;
Then click on the "Search" button (Pointer 1). As a result, the information about the lot that already exists in the database, namely the data in the fields: "Auction", "Year Make Model" and "Lot number" will be filled in automatically. After that continue filling in the fields:
-
"Full name" - enter the surname, first name and patronymic of the payer in Latin letters;
-
"Buyer" - from the drop-down list that opens when you click on the button
, select the account number used to log into the auction account;
-
"Amount" - using keyboard input or by pressing the buttons
, enter the amount to be paid with the auction fee;
-
"Document number" - enter the payer's document number.
To save the data click on the "Create" button, in case of canceling click on the "Cancel" button.
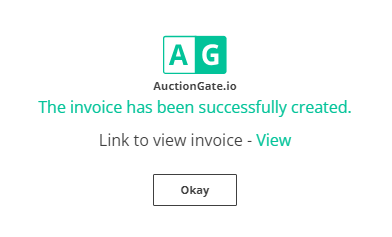
As a result of the performed actions there will be a created invoice for payment, as evidenced by the information in the opened window (Figure 4). Click the "Okay" button to close the window.

Figure 3 - Create Invoice window

Figure 4 - Notification of Invoice Creation
PDF Invoice Creation
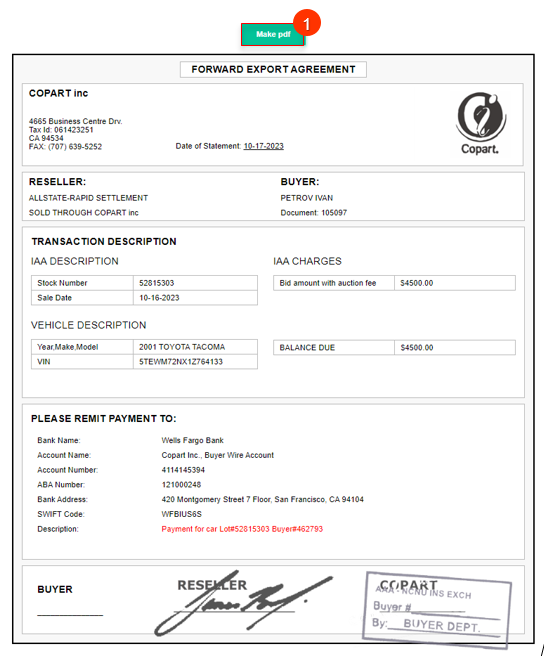
To create a PDF format for an invoice, select the desired invoice in the table area and click the "View" button located in the Actions column of the table area (Figure 1, Pointer 4). This will open the invoice in a new browser tab (Figure 5). Then click on the "Make pdf" button located at the top of the page (Figure 5, Pointer 1). As a result, the invoice will be created in PDF format, as evidenced by its opening in the browser window.

Figure 5 - Viewing an Invoice


