AuctionGate | Logistic CRM system - View deal
To view the deal, click on the button ![]() (Figure 1, Pointer 1).
(Figure 1, Pointer 1).
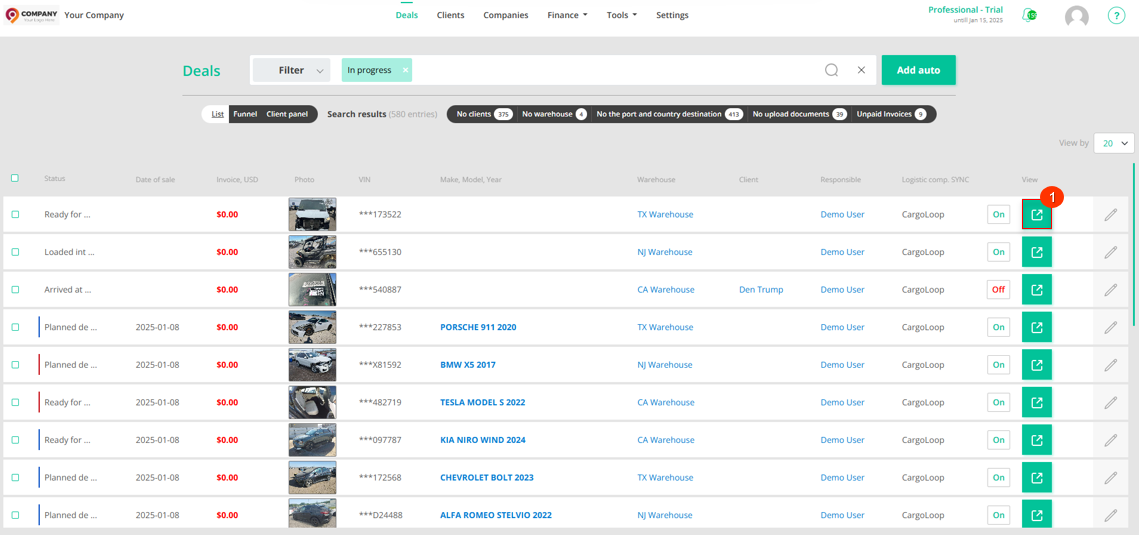 Figure 1 - Website page “Deals”
As a result, a page for viewing the deal will open with complete information about the vehicle, where functionality such as creating an invoice for payment, downloading customs documents and downloading customs payments will be available to her.
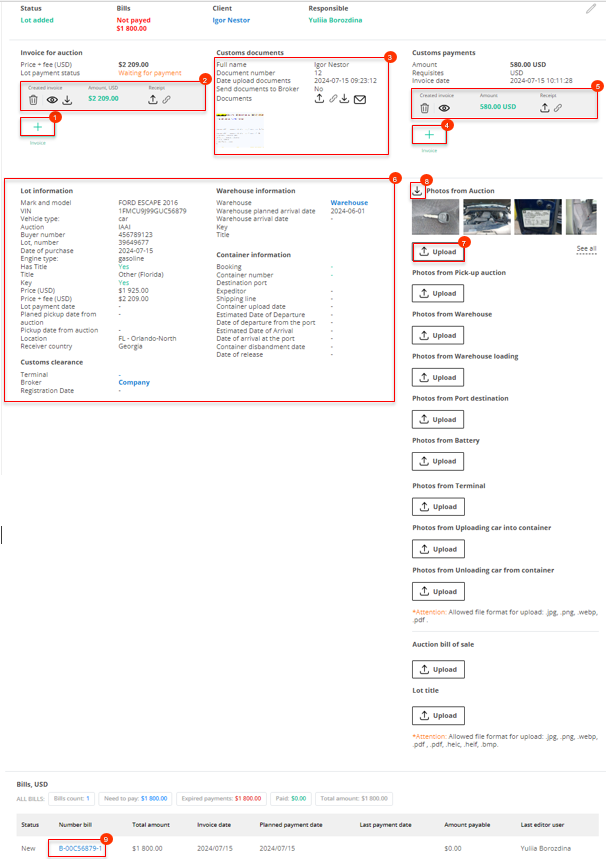 Figure 2 - Deal page
Invoice for auction:
On the deal page, you can create an invoice to pay for the purchased vehicle at the auction. To do this, click on ![]() (Figure 2, Pointer 1), after which the window “Invoice for auction”, in which fill in the client’s first and last name, his passport details and amount (Figure 3).
(Figure 2, Pointer 1), after which the window “Invoice for auction”, in which fill in the client’s first and last name, his passport details and amount (Figure 3).
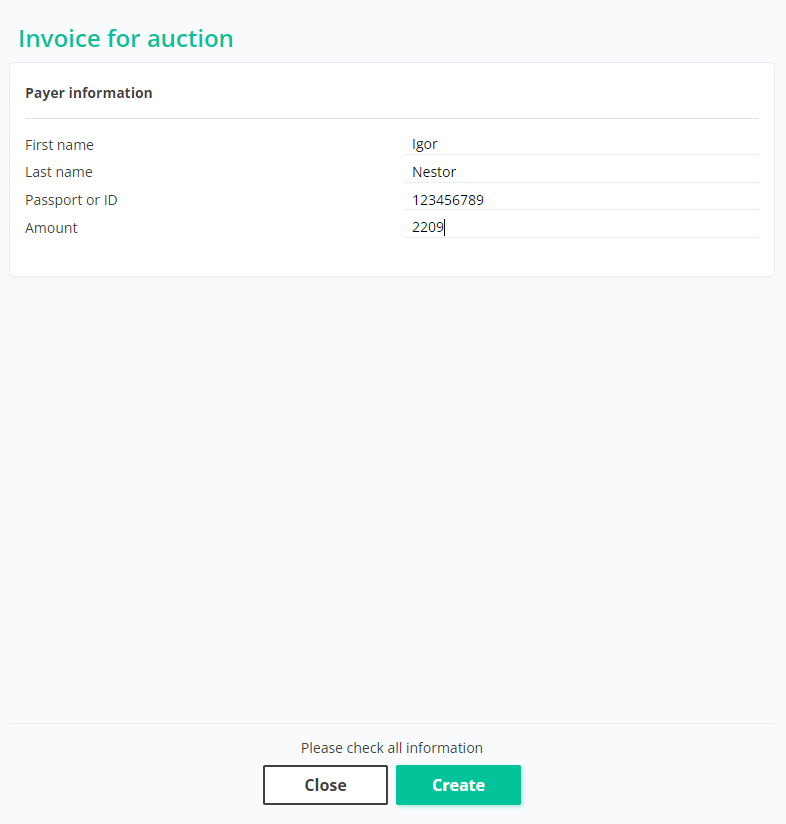 Figure 3 - Window “Invoice for auction”
To save data, click on the button “Create”. As a result of the completed actions, an invoice for payment will be created, which will be displayed above (Figure 2, Pointer 2).
To create a PDF invoice format, click on the button ![]() , after which the account will be opened in a new browser tab. To download the file, click on the button “Download PDF”, which is located at the top of the page (Figure 4, Pointer 1).
, after which the account will be opened in a new browser tab. To download the file, click on the button “Download PDF”, which is located at the top of the page (Figure 4, Pointer 1).
 Figure 4 - View invoice
To download the payment receipt, click on the button ![]() , after which the download window will open. Select the appropriate receipt file on your computer or device and confirm the download.
, after which the download window will open. Select the appropriate receipt file on your computer or device and confirm the download.
You can also download your receipt by following the link. To do this, click on ![]() , after which a download window will open in a new browser tab. Click on the button "Upload", select the appropriate receipt file on your computer or device and confirm the download (Figure 5).
, after which a download window will open in a new browser tab. Click on the button "Upload", select the appropriate receipt file on your computer or device and confirm the download (Figure 5).
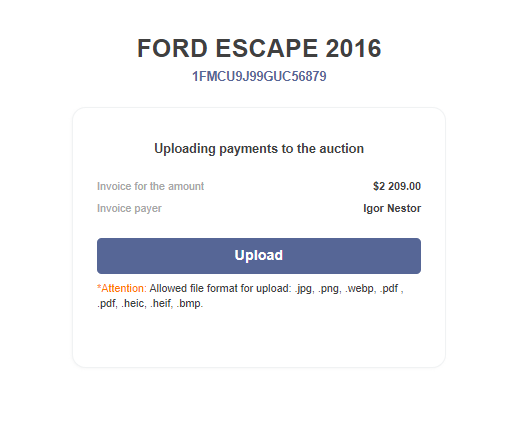 Figure 5 - Public receipt download page
To delete an account, click the button ![]() , which will lead to the account being deleted from the system.
, which will lead to the account being deleted from the system.
Customs documents:
To upload documents, click on the button ![]() after which a window will open “Customs documents”, in which fill in the payer’s name, surname and document number, then select the file to download by clicking on the button
after which a window will open “Customs documents”, in which fill in the payer’s name, surname and document number, then select the file to download by clicking on the button ![]() (Figure 6, Pointer 1). To save, click on the button “Save”.
(Figure 6, Pointer 1). To save, click on the button “Save”.
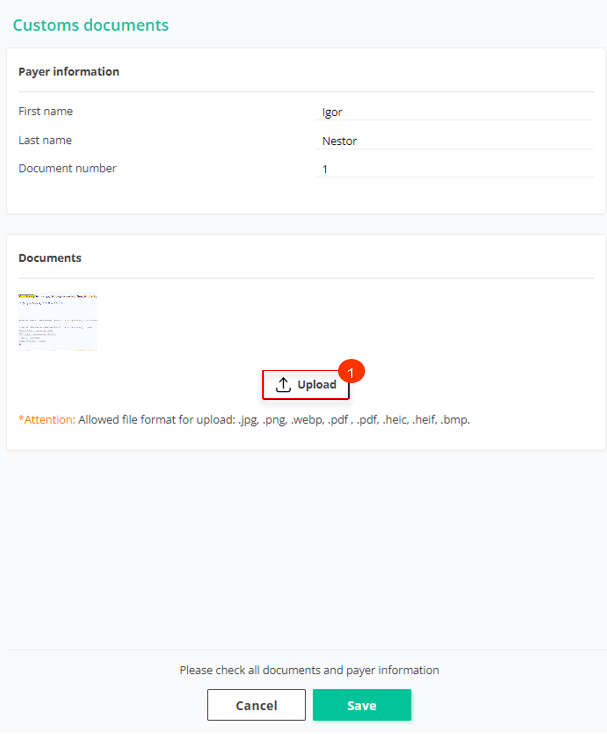 Figure 6 - Window “Customs documents”
You can also download your documents by following the link. To do this, click on ![]() , after which a download window will open in a new browser tab. Click on the button "Upload", select the appropriate file on your computer or device and confirm the download by clicking the button “Send data” (Figure 7).
, after which a download window will open in a new browser tab. Click on the button "Upload", select the appropriate file on your computer or device and confirm the download by clicking the button “Send data” (Figure 7).
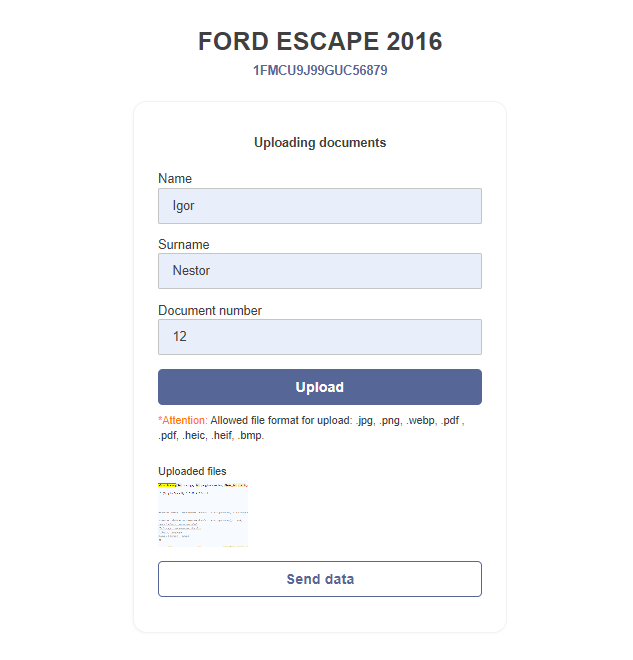 Figure 7 - Public page for downloading a document
As a result of the actions performed, information about the downloaded file will be displayed in the block “Customs documents” (Figure 2, Pointer 3) . To download the uploaded document, click on the button ![]() , then select a location to save the file and click "Save".
, then select a location to save the file and click "Save".
If you need to delete a document, click on the file ![]() , after which a window will open in which to confirm the deletion, click on the button "Yes” button to cancel - "No". To send a document to a broker, click on the button
, after which a window will open in which to confirm the deletion, click on the button "Yes” button to cancel - "No". To send a document to a broker, click on the button ![]() , which will open the window”Send mail to broker" To send the document, click on the button "Send" (Figure 8).
, which will open the window”Send mail to broker" To send the document, click on the button "Send" (Figure 8).
Note: To send documents, the broker must have an email address.
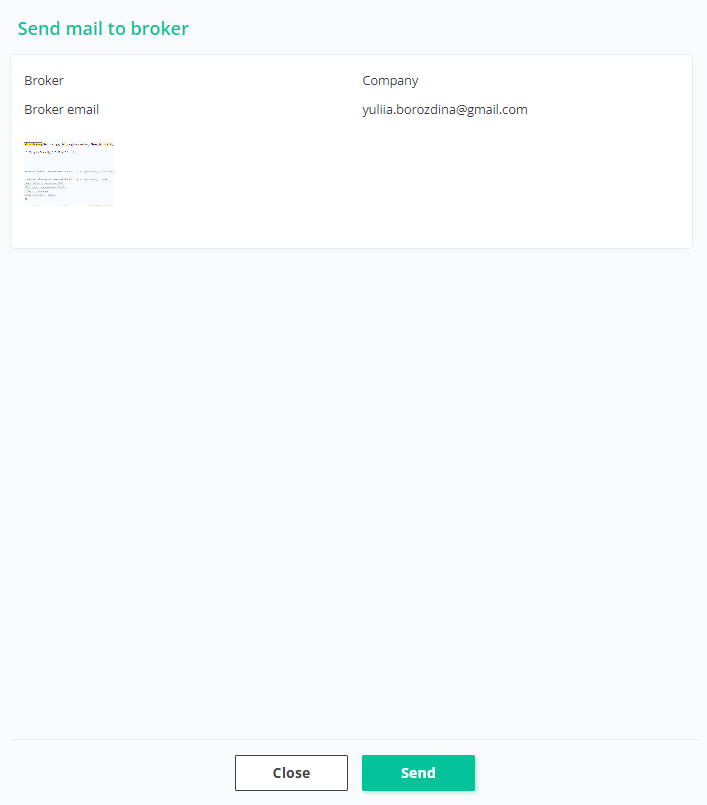 Figure 8- Window for sending a letter to a broker
To save the data, click the “Create invoice” button. As a result, an invoice will be created and displayed above (Figure 2, Pointer 5).
By clicking the ![]() button, the details document will open in a new browser tab.
button, the details document will open in a new browser tab.
To upload a payment receipt, click the ![]() button, which will open the upload window. Select the appropriate receipt file from your computer or device and confirm the upload.
button, which will open the upload window. Select the appropriate receipt file from your computer or device and confirm the upload.
You can also upload a receipt via a link. To do this, click the button, and the upload page will open in a new browser tab. Click the ![]() button, select the relevant file with the receipt from your computer or device, and confirm the upload (Figure 10).
button, select the relevant file with the receipt from your computer or device, and confirm the upload (Figure 10).
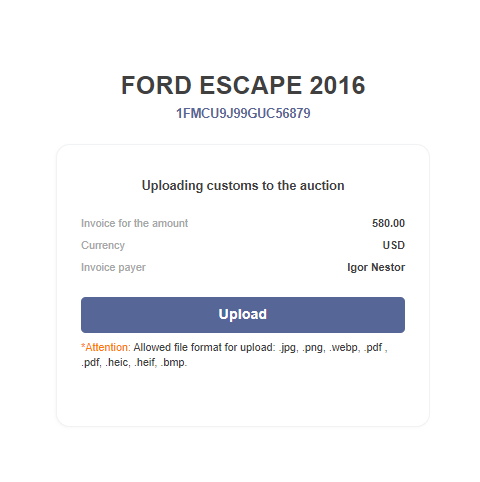 Figure 10 - Public Payment Receipt Upload Page
To delete the invoice, click the ![]() button, which will remove the invoice from the system.
button, which will remove the invoice from the system.
Customs payments:
On the deal page, the function of creating an invoice for customs payment is available. To do this, click on ![]() (Figure 2, Pointer 4), after which the window “Customs payments”, in which fill in the amount, select details and indicate the client’s first and last name (Figure 10).
(Figure 2, Pointer 4), after which the window “Customs payments”, in which fill in the amount, select details and indicate the client’s first and last name (Figure 10).
Note: If you need to add details, click on ![]() , which will open the “Requisites”, where fill in the appropriate fields.
, which will open the “Requisites”, where fill in the appropriate fields.
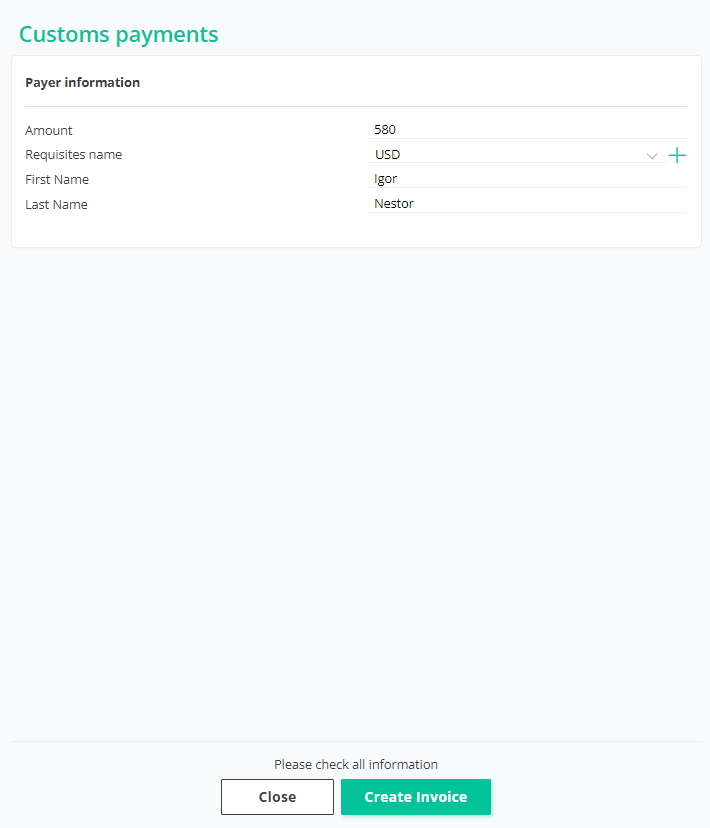 Figure 10- Window “Customs payments”
To save data, click on the button “Create invoice”. As a result of the completed actions, an invoice for payment will be created, which will be displayed above (Figure 2, Pointer 5).
When you press the button ![]() The details document will be opened in a new browser tab.
The details document will be opened in a new browser tab.
To download the payment receipt, click on the button ![]() , after which the download window will open. Select the appropriate receipt file on your computer or device and confirm the download.
, after which the download window will open. Select the appropriate receipt file on your computer or device and confirm the download.
You can also download your receipt by following the link. To do this, click on ![]() , after which a download window will open in a new browser tab. Click on the button "Upload", select the appropriate receipt file on your computer or device and confirm the download (Figure 11).
, after which a download window will open in a new browser tab. Click on the button "Upload", select the appropriate receipt file on your computer or device and confirm the download (Figure 11).
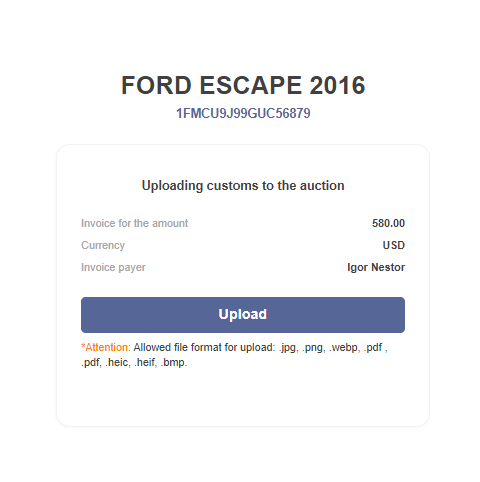 Figure 11 - Public receipt download page
To delete an account, click the button ![]() , which will lead to the account being deleted from the system.
, which will lead to the account being deleted from the system.
Next, information about the vehicle is displayed on the deal card. (Figure 2, Pointer 6). To make changes to information about the deal, click on the button ![]() (for additional instructions, see the “Editing a deal” section).
(for additional instructions, see the “Editing a deal” section).
On the right side of the page, the function of downloading photos of the vehicle from its current warehouse and destination port is available. For this click on the button ![]() (Pointer 7), after which inSelect the file on your computer or device that you want to download, and then click on the “Save” button. As a result, loaded photos will be displayed in the appropriate section.
(Pointer 7), after which inSelect the file on your computer or device that you want to download, and then click on the “Save” button. As a result, loaded photos will be displayed in the appropriate section.
If you want to save the photos to your computer or device, click the button ![]() (Pointer 8), select a location to save the file and click the button "Save".
(Pointer 8), select a location to save the file and click the button "Save".
At the bottom of the page you can see information about the accounts associated with this vehicle. If necessary, you can click on the account number to get more detailed information or make changes (Pointer 9).(Additional instructions look in section "Accounts")


